Packing decisions
How to prepare furniture for a move
Furniture preparation starts with two practical questions: will the piece fit along its route, and how will it be handled without damaging the piece or the home? Wrapping a dresser before measuring the stair turn does not solve either problem. Begin with an inventory and a route check, then decide which items can remain assembled, which can be partly dismantled under their instructions, and which require professional help.
A household move may include furniture built from different materials and assembled in different ways. A solid wood table, a flat-pack bookcase, a sleeper sofa, and an adjustable desk should not receive one generic procedure. Read the manufacturer's guidance when available and coordinate with the moving provider's written scope. Do not take apart a mechanism just because a screw is visible.
The aim is to make loading and reassembly predictable. Record measurements, photograph connections, keep hardware with its piece, protect vulnerable surfaces, and reserve enough time to check the work. This guide focuses on planning and organization. Lifting, disassembly, and transport should follow the item instructions, building rules, and the capabilities of the people doing the work.
Inventory every large piece
Walk through the old home and list the furniture that will travel. Include pieces in basements, garages, storage rooms, and outdoor spaces. Record the destination room in the new home, broad dimensions, and whether the item has removable parts. A short table in a notebook or spreadsheet is enough if it helps you make decisions and check the load later.
Give each piece a simple identifier, such as “dining table” or “BR2 bookcase.” If there are several nearly identical chairs or shelves, add a number. Record any known condition issues privately: a loose leg, chipped finish, missing glide, or drawer that sticks. Photograph notable areas before moving if that will help you distinguish existing wear from later changes.
Decide what will not move. An oversized piece may not fit the new space; a damaged item may not be worth transporting. Sell, donate, recycle, or dispose of items according to local options and enough time before loading. Keeping them on the inventory until the final day can lead to wasted preparation and an unexpectedly crowded truck.
Do not assume every listed item will be carried by the same provider. A piano, large safe, built-in unit, or specialty mechanism may be outside a general mover's scope or require a separate service. Confirm before making a packing plan. Record who is responsible for each item and what preparation that person or provider expects.
Measure the furniture and the route
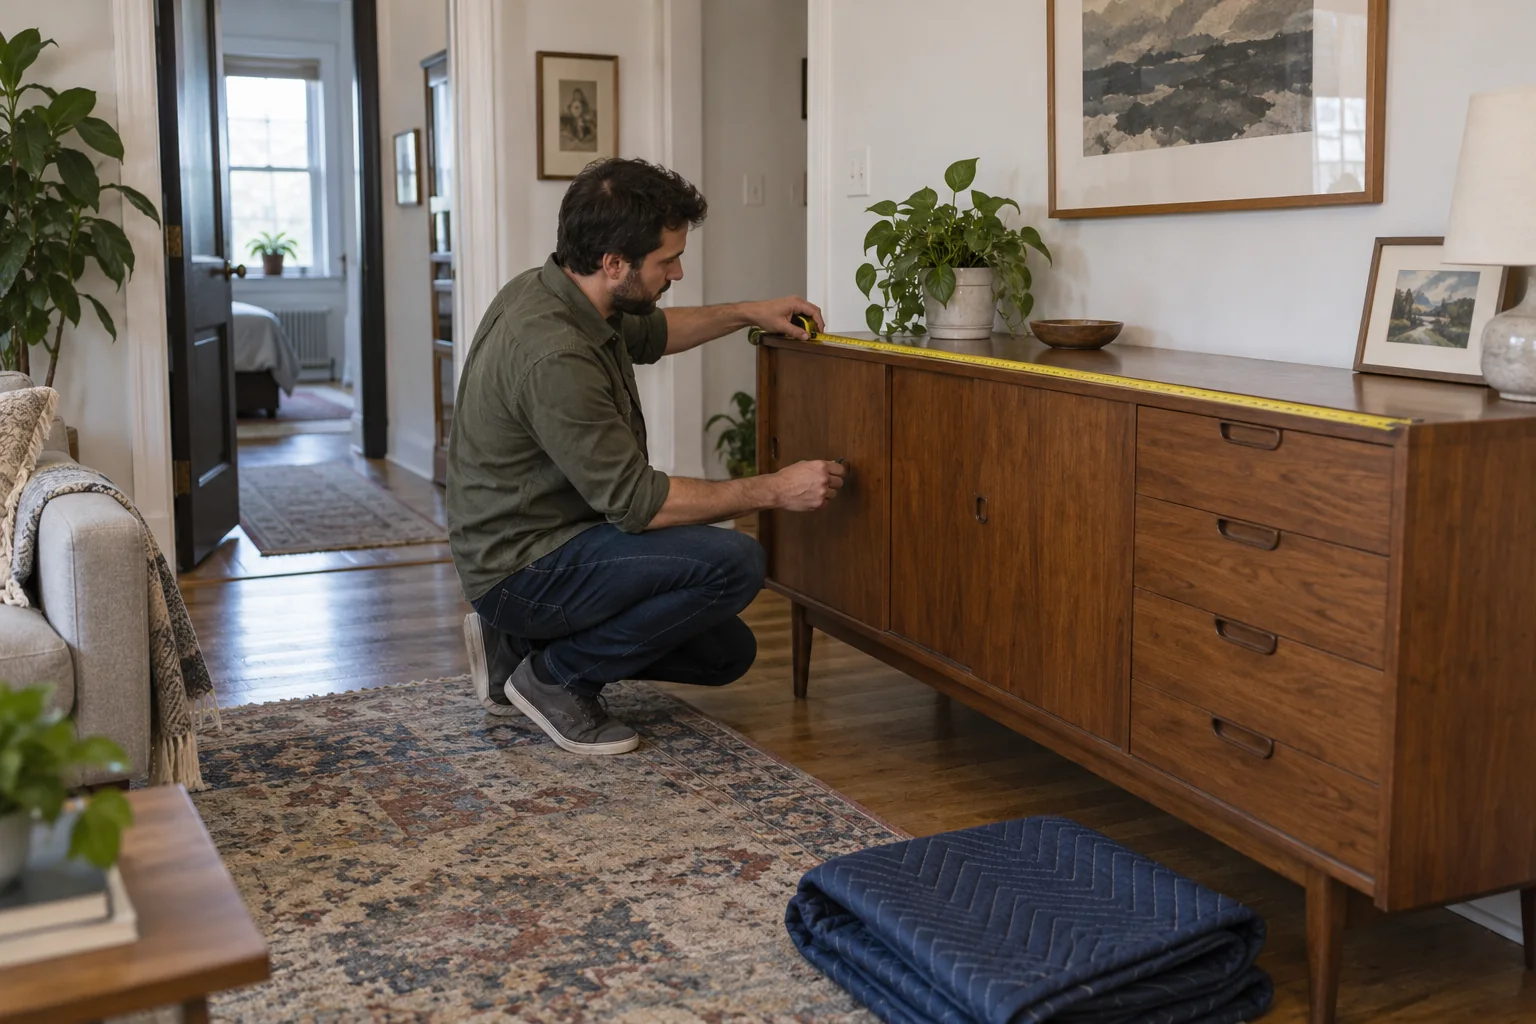
Measure the item's height, width, depth, and any projection that changes the shape, such as legs, arms, handles, or a curved back. Note dimensions with and without parts you might remove, but treat the smaller measurement as conditional until you know that removal is permitted and practical. For an irregular object, sketch the shape and mark the widest points.
Measure the route out of the old home and into the new one. Look at door openings, hallways, landings, stair turns, elevators, and exterior entries. The route matters as much as the final room. Check the clear opening rather than only the nominal door size, and account for handrails, door hardware, ceiling slopes, and other obstacles.
A simple comparison of width with doorway width may be misleading. An item can need room to turn, tilt, or maneuver around a corner. Do not promise that it will fit from a few numbers alone. If clearance is close, ask the mover or an appropriate professional to assess the actual route. Leave room for protective material where it affects fit.
Check access rules and reservations at both properties. An elevator booking, loading dock time, parking restriction, or building protection requirement can shape the order of work. Get the current rules from the property manager or relevant provider. Note them alongside the furniture inventory so preparation and delivery plans use the same assumptions.
Decide what stays assembled
Leaving a piece assembled can save time and reduce the risk of lost hardware, but it may make the item harder to move. Disassembly can improve clearance or protect vulnerable parts, but only if the piece is designed for it and can be reassembled correctly. Consider each item rather than applying a blanket rule to all furniture.
Read the product's assembly and moving guidance if available. Some pieces may be weakened by repeated disassembly or require specific fasteners and tightening steps. Adjustable or powered furniture may have additional instructions for securing moving parts or disconnecting power. Keep the manual or an accessible copy with your move records.
Ask the moving provider what it will disassemble and reassemble under the agreed service. Identify any work the household must complete before arrival. A verbal assumption can cause delay when movers are ready to load a piece that is still attached to a wall or assembled too wide for the route. Put responsibilities in the written move plan.
Do not attempt a task beyond the available people, tools, or instructions. Heavy lifting and unstable pieces create real injury and damage risks. If removal of a component seems complicated or the piece has a spring, motor, electrical connection, or built-in attachment, seek suitable help. Planning the boundary of household work is part of preparation.
Photograph before taking anything apart
Take photos of the complete piece from several sides. Capture how legs, shelves, drawers, supports, and panels are arranged. If you will remove hardware, photograph the attachment points before loosening them. A clear photo can resolve uncertainty when two parts appear interchangeable but are not.
Make a brief note of the order in which parts come off. You can number pieces with removable labels placed where they will not damage a finish. Keep the labeling scheme simple: “table leg 1” should refer to one specific leg and one position. If a manufacturer gives a reassembly sequence, follow that rather than improvising from photographs.
Do not photograph only the decorative front. The underside of a table, the back of a shelving unit, and the inside of a bed frame may contain the information needed for reassembly. Capture fastener orientation and any spacer or washer that might otherwise be forgotten.
Store the photos somewhere you can access after arrival. If they are only on a device that will travel in an inaccessible carton, they may not help. For important furniture, include the item identifier in the image file name or a note so photos from several pieces do not become mixed together.
Keep hardware with the correct piece
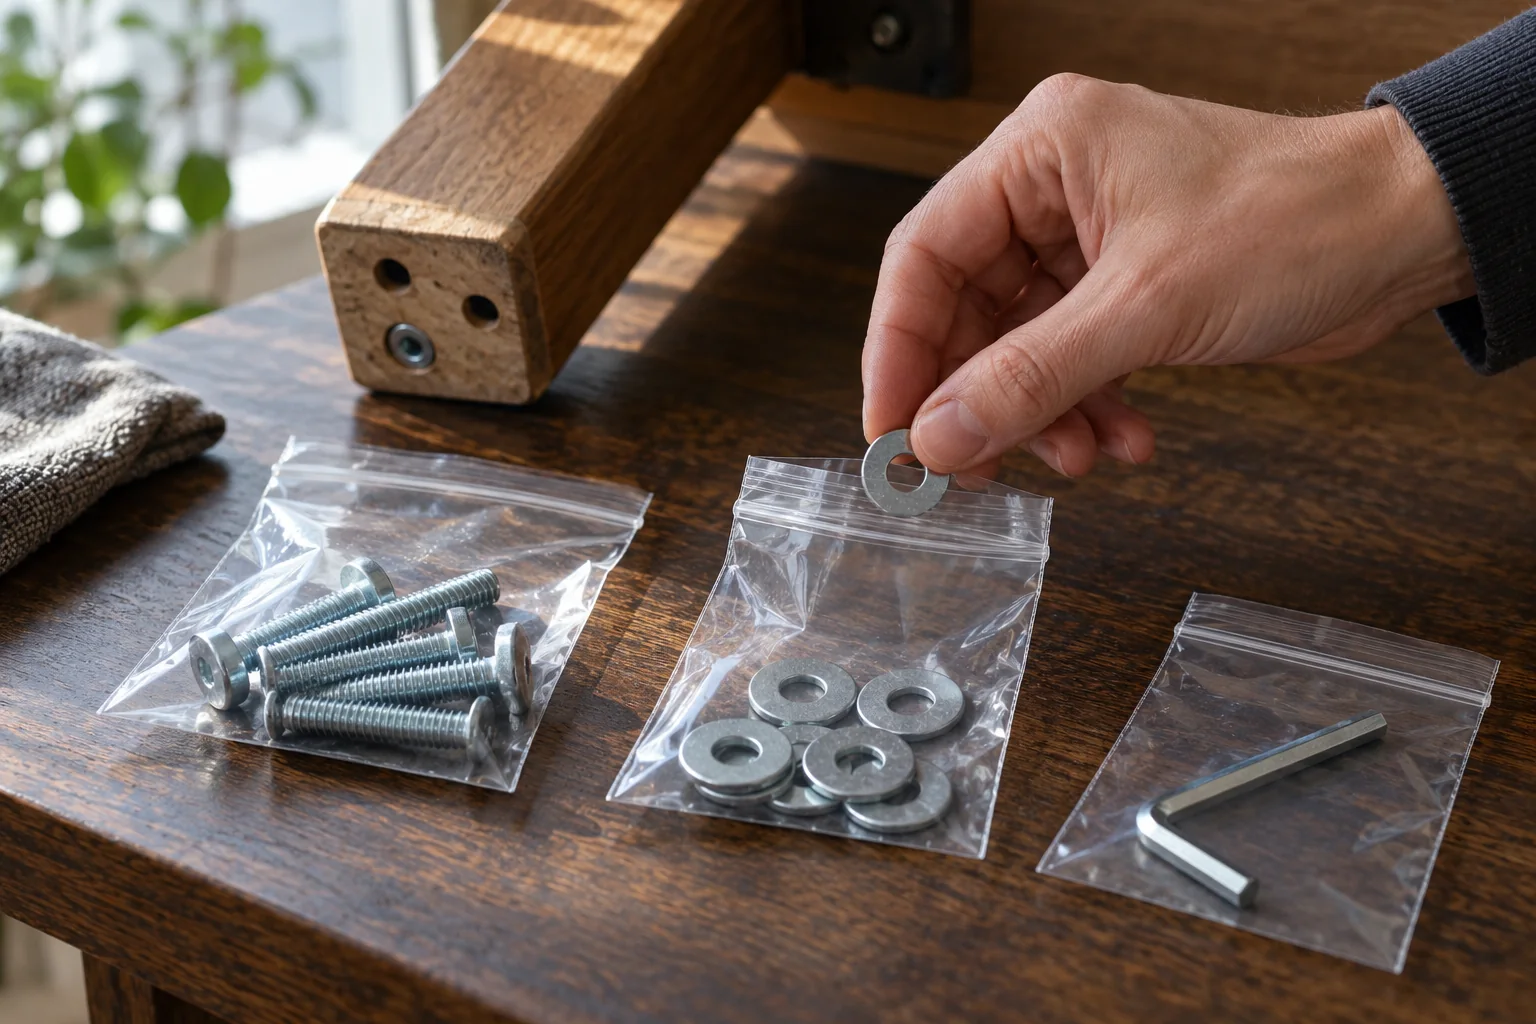
Put removed screws, bolts, washers, shelf pins, and brackets in a small, secure container or bag for that piece. Label it with the furniture identifier and, if useful, the step or location. If there are different fastener types, separate them rather than mixing everything in one bag. A quick count before sealing can catch a dropped screw.
Attach the hardware container to an appropriate protected part only if it will not damage the finish or interfere with handling. Otherwise place it in a clearly marked hardware box and record which furniture item it belongs to. Do not tape metal fasteners directly against a finished surface. Avoid leaving loose hardware inside a drawer where it may move or scratch the interior.
Keep specialized tools or keys with the relevant hardware. A bed frame may require a particular wrench; an adjustable desk may need its supplied tool. If the tool belongs to several pieces, put it in a central toolkit and list those dependencies. Reassembly often stalls because the necessary tool was packed in a general household box.
Record any missing or damaged fastener before the move, not after you begin rebuilding. Use the manufacturer's information to identify a replacement where needed. Do not substitute hardware casually in a load-bearing connection. If a connection will not reassemble as designed, pause and find appropriate guidance.
Secure moving parts and contents
Empty drawers and shelves when required by the item's design or the mover's instructions. Contents add weight and may shift. A drawer full of books can change how a dresser is handled. Decide whether a removable drawer should travel separately and how it will be identified with the parent piece.
Protect doors, drawers, and panels so they will not swing open during handling. Use a method suitable for the finish and mechanism. Adhesive applied directly to furniture can leave residue or damage a surface; test or use another protection method according to product guidance. Do not lock a door if the key could be lost or the frame could be stressed during transport.
Remove fragile shelves or glass components when the item's instructions call for it. Pack each component with its furniture identifier and destination. Mark the hardware required to reinstall it. A detached glass shelf should not be left leaning unprotected in the same truck as heavy furniture.
For powered furniture, follow the product instructions for disconnecting, securing cables, and preparing movable mechanisms. Keep remotes or control units in a labeled bag. Do not guess how to secure a motorized component; improper restraint can cause damage or create a hazard for the people moving it.
Protect surfaces without hiding problems
Identify vulnerable edges, corners, legs, glass, and finishes. Choose protection that fits the material and the route. Moving pads, suitable wrap, corner protection, or a fitted cover may be useful, but their use depends on the piece and the mover's method. Ask the provider what materials it supplies and what it expects you to prepare.
Clean loose dust or grit before wrapping. Debris trapped against a finish can scratch it during handling. Make sure a cover does not trap moisture on a surface that must remain dry. Follow product-specific care instructions for materials such as leather, unfinished wood, or delicate coatings.
Do not wrap an already loose joint so thoroughly that its condition is hidden from everyone handling it. Record the issue and tell the responsible mover. Protection should make the item easier to move safely, not conceal a structural problem or create an awkward shape that cannot be gripped.
Check whether protection changes the clearance along the route. Thick padding may be necessary, but it can make a close doorway tighter. Discuss a close fit with the moving team before the item reaches the doorway. Avoid forcing a piece through an opening based on a measurement taken before wrapping.
Plan the loading and delivery sequence
Large furniture may need to enter or leave the truck in a particular order. Share the destination plan and any route constraints with the mover or household team. If a bed must be assembled before the first night, keep its hardware and tools accessible. If a sofa blocks a hallway, schedule its placement so other items can still reach their rooms.
Put room identifiers on protected furniture in a way that does not damage it. A label on a removable cover or suitable tag can help. Make the destination match the room signs used for boxes. Do not rely on “the big dresser” when several similar items will arrive together.
Keep a small assembly kit accessible: suitable tools, a copy of the item list, and the hardware boxes needed early. The kit can travel with you or be placed in an identified priority carton under the transport plan. Do not pack every tool in the same large box as general garage items if the furniture must be rebuilt before those boxes are opened.
If some pieces will go into storage, identify them now. The access date and storage conditions may affect what protection and hardware records are appropriate. Review packing when your belongings will go into storage for a separate inventory and retrieval plan. Do not mix storage-bound hardware with hardware needed at the new home this week.
Prepare a realistic supply list
Count the materials based on the actual furniture inventory. A dozen small tables may need different protection from one oversized cabinet. List covers, padding, suitable containers for hardware, removable labels, and any tools you need. Confirm what the moving provider will bring so you do not duplicate supplies or leave a gap.
Test supplies on one representative piece. Does the cover fit? Can the label be read? Will the hardware bag stay with the correct item? A small trial exposes problems while there is still time to adjust. It can also show that an item requires more protection than you initially expected.
Do not buy a generic quantity solely because it appears on a moving checklist. How to estimate the packing supplies your household needs explains how to build an estimate from the actual inventory and update it after a trial. Include furniture protection as a separate line from cartons for dishes or books.
Make room for return or reuse. Some materials may be rented or supplied by the mover, while others can be reused later if they remain sound. Record which items must be returned after unloading. A clear supply list is useful for both packing and cleanup.
Check the route on move day
Walk the planned path before the first large piece moves. Clear boxes, rugs, and loose obstacles. Confirm that reserved elevators or access doors are available under building rules. Identify any change since the earlier measurement, such as a temporary barrier or parked vehicle. Share it with the people handling the furniture.
Make sure the piece is ready: drawers secured or removed as planned, hardware accounted for, protection intact, and destination known. If a component is unexpectedly loose, stop and reassess. A last-minute change in shape or weight can invalidate the earlier route plan.
Keep bystanders away from the moving path and let the people handling the load communicate. Do not improvise a tight maneuver while someone is underneath or behind an unstable item. If a piece does not fit, set it down safely and reconsider the route or disassembly plan with appropriate help.
At the new home, confirm the destination before carrying the item through multiple rooms. The route into the new space may have its own constraints even if the piece left the old home easily. Check wall and floor protection requirements and keep doors or elevators available as arranged.
Reassemble and inspect deliberately
Before rebuilding, place parts and hardware near the destination, but keep pathways clear. Use the photos and manufacturer instructions. Check that the correct fasteners are present and that no part has been substituted from another piece. If the assembly requires two people or a specific sequence, arrange that before starting.
Tighten and secure connections according to the product instructions. Do not use a damaged fastener or force misaligned parts into place. Verify that the item is stable before loading it with books, clothing, or equipment. For wall-anchored furniture, follow the product's guidance and the new property's requirements for attachment.
Inspect the item for condition and function while the move is fresh. Open drawers and doors, check moving mechanisms, and compare notable areas with the earlier photos if needed. Document any concern and follow the carrier's reporting process when a provider handled the item. Keep relevant paperwork and photos together.
Finally, return hardware bags and manuals to a sensible storage location. Remove temporary labels and protection after you are sure the item is in its final position. Mark the furniture inventory as delivered and assembled. The preparation work is complete when the piece is placed, stable, usable, and accounted for, not merely when it comes off the truck.